
If you own a classic or late-model car or truck, one thing is certain: at some point, you will need to change your engine oil. This essential maintenance task is crucial for the longevity and performance of your vehicle. By doing it yourself, you can save between 30 and 40 percent on your oil changes. Here’s a step-by-step guide to help you successfully change your engine oil, ensuring your car runs smoothly and efficiently.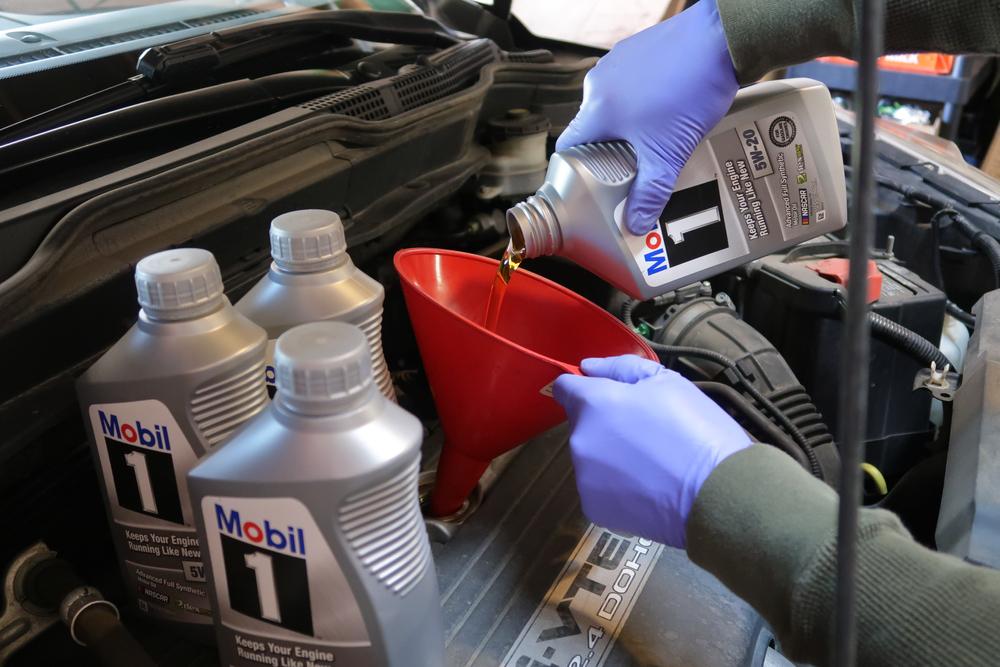
Why Changing Your Oil is Important
Engine oil is the lifeblood of your vehicle, critical for lubricating moving parts, reducing friction, and preventing overheating. Regular oil changes, typically every 3,000 to 5,000 miles, are vital for maintaining engine health and performance. Ignoring this maintenance can lead to increased wear and tear, overheating, and even engine failure.
Preparing for the Oil Change
Before you begin, there are a few preparatory steps to ensure a smooth and safe oil change process:
- Warm Up the Engine: Take your car for a short drive to warm up the engine oil. This helps the oil flow more easily when draining. However, let it cool down for a few minutes afterward to avoid burns.
- Elevate the Vehicle Safely: Use suitable ramps or a jack and jack stands to lift your car. Never work under a car supported only by a floor jack, as this is highly dangerous.
- Gather Necessary Tools and Materials:
- Oil drain pan (large enough to hold the amount of oil in your vehicle)
- Oil filter wrench (various types available depending on your vehicle)
- Correct size wrench for the oil drain plug
- New oil filter
- Engine oil (ensure it’s the correct viscosity for your vehicle)
- Rubber gloves for a cleaner process
- Funnel for refilling the oil
Step-by-Step Oil Change Process
- Locate the Oil Drain Plug: Refer to your owner's manual to find the location of the oil drain plug and the specifications for the amount and type of oil needed.
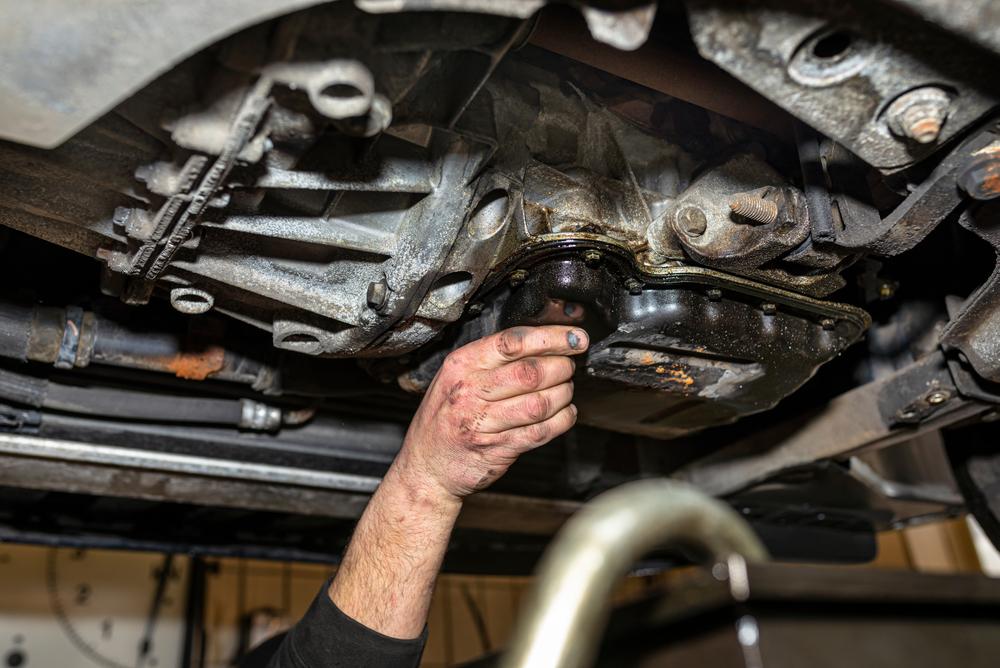
- Position the Oil Drain Pan: Place the drain pan under the oil drain plug. Ensure it's positioned to catch all the oil that will be draining out.
- Remove the Drain Plug: Using the correct size wrench, carefully loosen and remove the oil drain plug. Allow the oil to drain completely into the pan.
- Remove the Oil Filter: Use the oil filter wrench to remove the old oil filter. Be cautious, as it will contain hot oil. Check that the rubber O-ring from the old filter is not stuck to the engine block.

- Prepare the New Filter: Apply a light coat of new engine oil to the O-ring of the new filter. If your oil filter is installed vertically, partially fill it with new oil to prevent a dry start.
- Install the New Filter and Drain Plug: Hand-tighten the new oil filter, then give it an additional quarter turn. Reinstall the oil drain plug, ensuring you replace the crush washer if your vehicle uses one.
- Refill with New Oil: Insert a funnel into the oil fill hole and pour in the correct amount and type of new engine oil. Double-check the amount specified in your owner’s manual.
- Check for Leaks and Clean Up: Start the engine and let it run for a few minutes. Check under the car for any signs of leaks. Clean up any spilled oil to prevent it from smoking or attracting dirt.
Final Tips
- Record the Mileage: Keep track of your mileage and note when your next oil change is due. You can use a windshield sticker or a logbook.
- Dispose of Used Oil Properly: Take your used oil to a recycling center or an auto parts store that accepts used oil.
By following these steps, you not only ensure that your vehicle is well-maintained but also gain confidence in your ability to perform basic automotive maintenance. Changing your oil is a straightforward task that can save you money and give you peace of mind knowing the job was done right.
Stay safe, keep your engine healthy, and enjoy the satisfaction of taking care of your vehicle yourself.